Rectified vs non-rectified ceramic tiles: how to choose
Choose rectified tiles for a continuous look, large formats and joints of 1 to 2 millimeters, especially in modern spaces with flat surfaces. Choose non-rectified tiles if the substrate is uneven, the budget is tighter or you want a rustic style with joints of 3 to 5 millimeters. The right decision depends on the tile format, the condition of the existing screed and the aesthetic direction of the project, not on an alleged superiority of either option.
In summary:The dimensional precision of rectified tiles allows very fine joints of 1 to 2 millimeters, which makes them suitable for uniform, modern surfaces.Installing rectified tiles requires a very flat substrate, and proper screed preparation can significantly affect the final look.Non-rectified tiles suit uneven surfaces, with wider joints of 3 to 5 millimeters, and give a more textured, rustic look.Rectified material costs on average 10–20% more, and installation involves extra labor to check and secure the flatness of the substrate.In projects with large formats, modern or commercial spaces, technical advice before choosing the tile can prevent costly adjustment and installation problems.
SelfDezign
Choose the right finish for your space
SelfDezign integrates finishing choices into customized interior designs, from concept and technical design to implementation.
Rectified vs non-rectified tiles: the technical difference
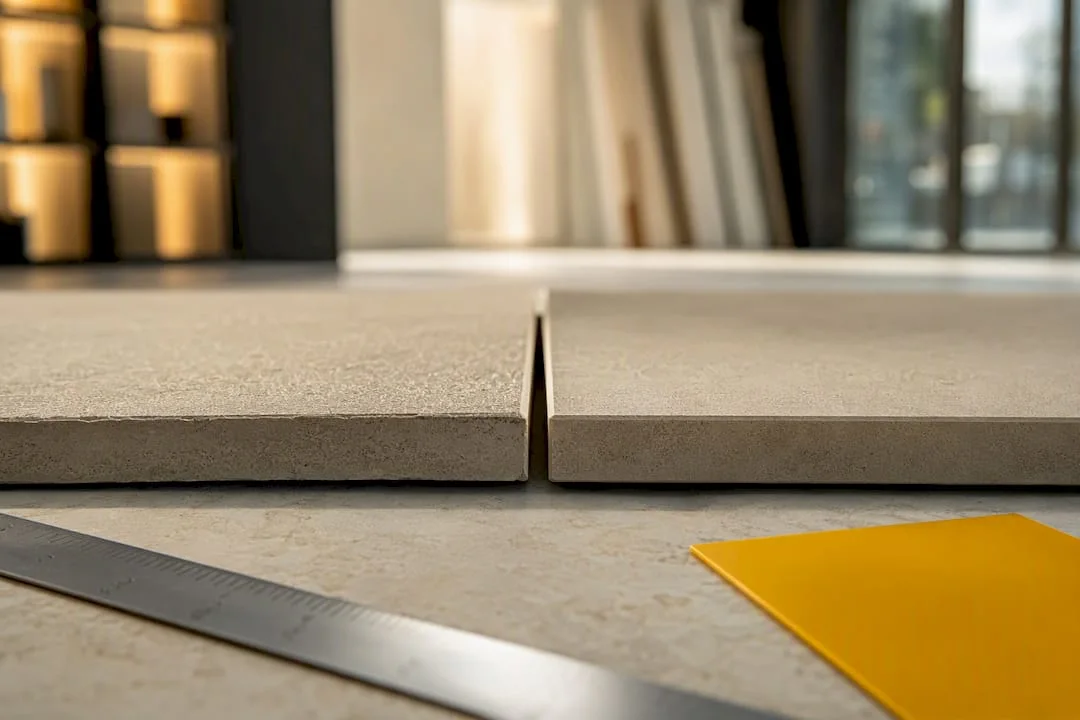
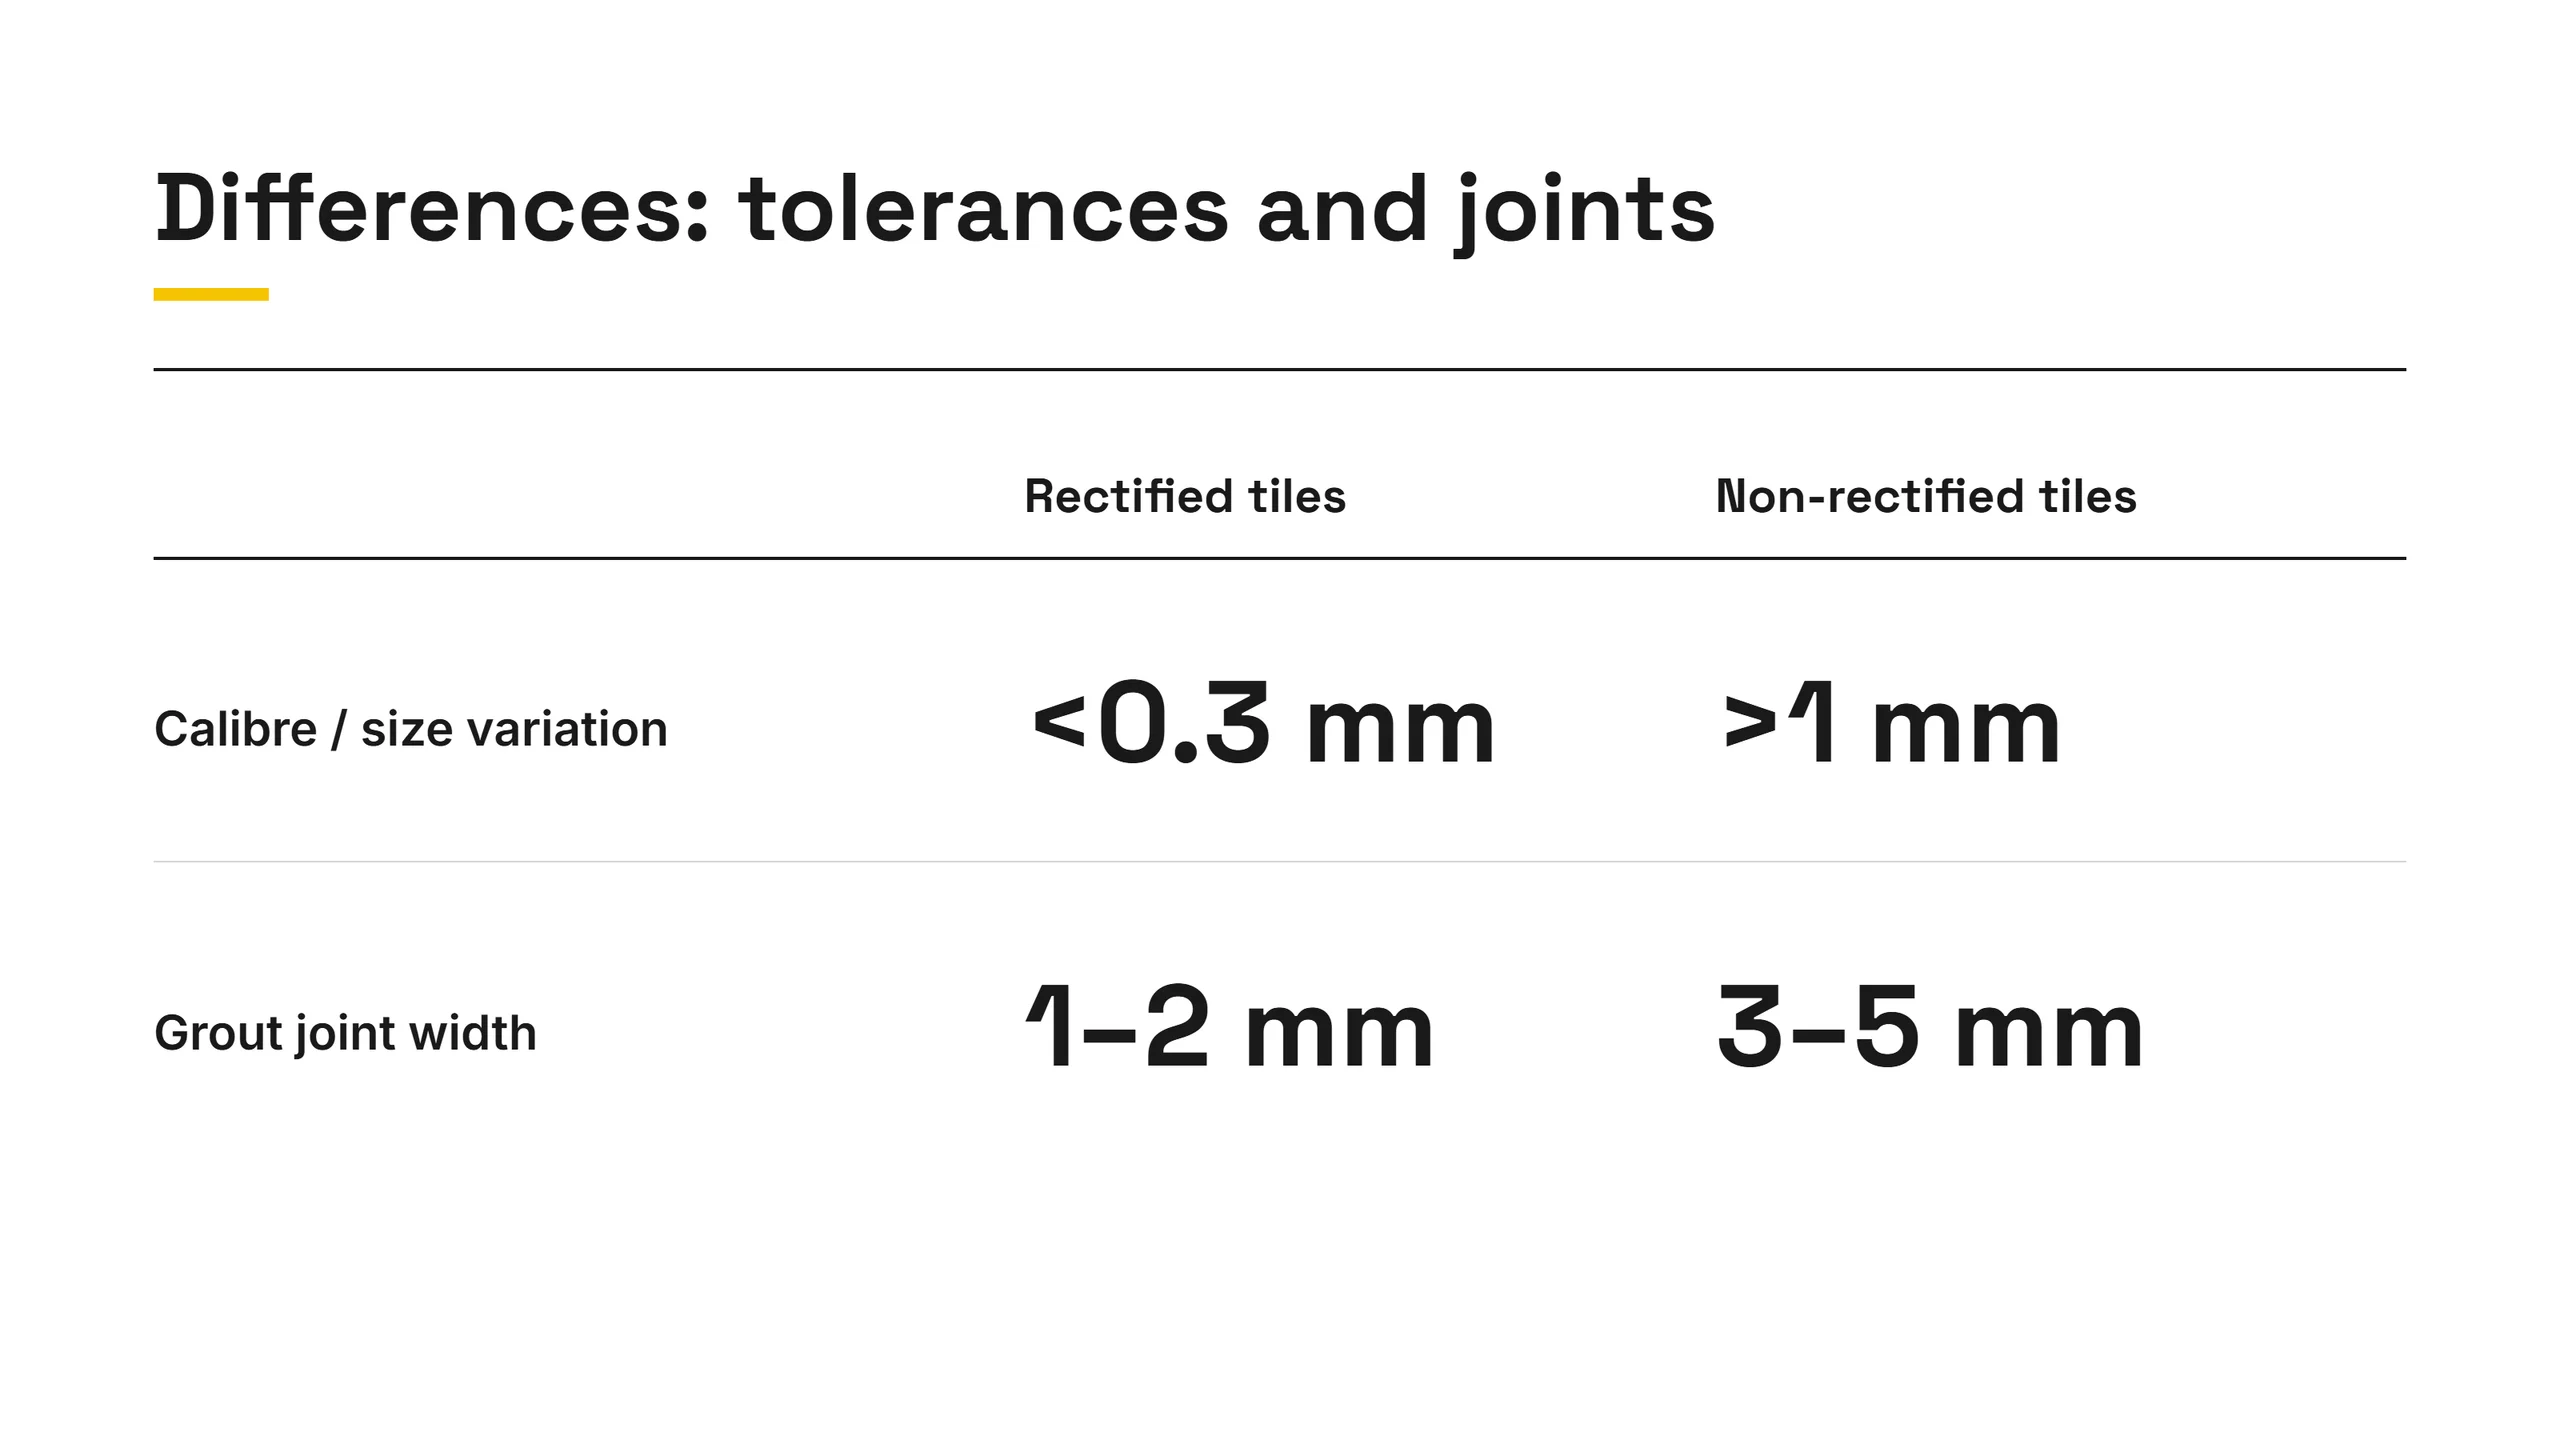
Rectification is a mechanical process that cuts the tile edges after firing. It produces 90-degree edges and dimensional tolerances below 0.3 millimeters. In practice, each tile is almost identical in size to its neighbor, which allows very fine joints of 1 to 2 millimeters.
Non-rectified tiles keep the natural edge from firing, with larger dimensional variations from one tile to the next. This is why they need wider joints, of a few millimeters, which visually absorb size (calibre) variation and tolerate an imperfect substrate better.
The tile format changes the whole equation. With large formats, such as 60x120 centimeters or more, rectification becomes almost mandatory for a uniform result, because any size variation shows across such a large surface. With small, classic formats, the difference between the two options is much less visible.
Aesthetically, rectified tiles give the impression of a continuous surface, with almost no visual interruption, while non-rectified tiles keep a more visible joint pattern, with texture and character. Neither is “better” in absolute terms. It depends on the visual vocabulary you want for the space.
In terms of cost, rectified tiles usually have a higher material price (constructii365.ro), and labor costs rise further because of the technical installation requirements.
Quick summary of the differences:
- Dimensional tolerance: rectified below 0.3 mm; non-rectified variable, usually above 1 mm.
- Recommended joint: 1 to 2 mm for rectified, 3 to 5 mm for non-rectified.
- Substrate requirement: rectified tiles need a very flat substrate; non-rectified tiles tolerate minor unevenness.
- Visual impact: rectified tiles give continuity; non-rectified tiles give texture and more visible joints.
Installation and materials: what to prepare on site
Installing rectified tiles requires a very flat substrate, because any unevenness in the screed becomes obvious on a surface with fine joints. This is why most visual failures with rectified tiles do not come from the tile quality, but from poor substrate preparation.
For a correct installation, follow these steps:
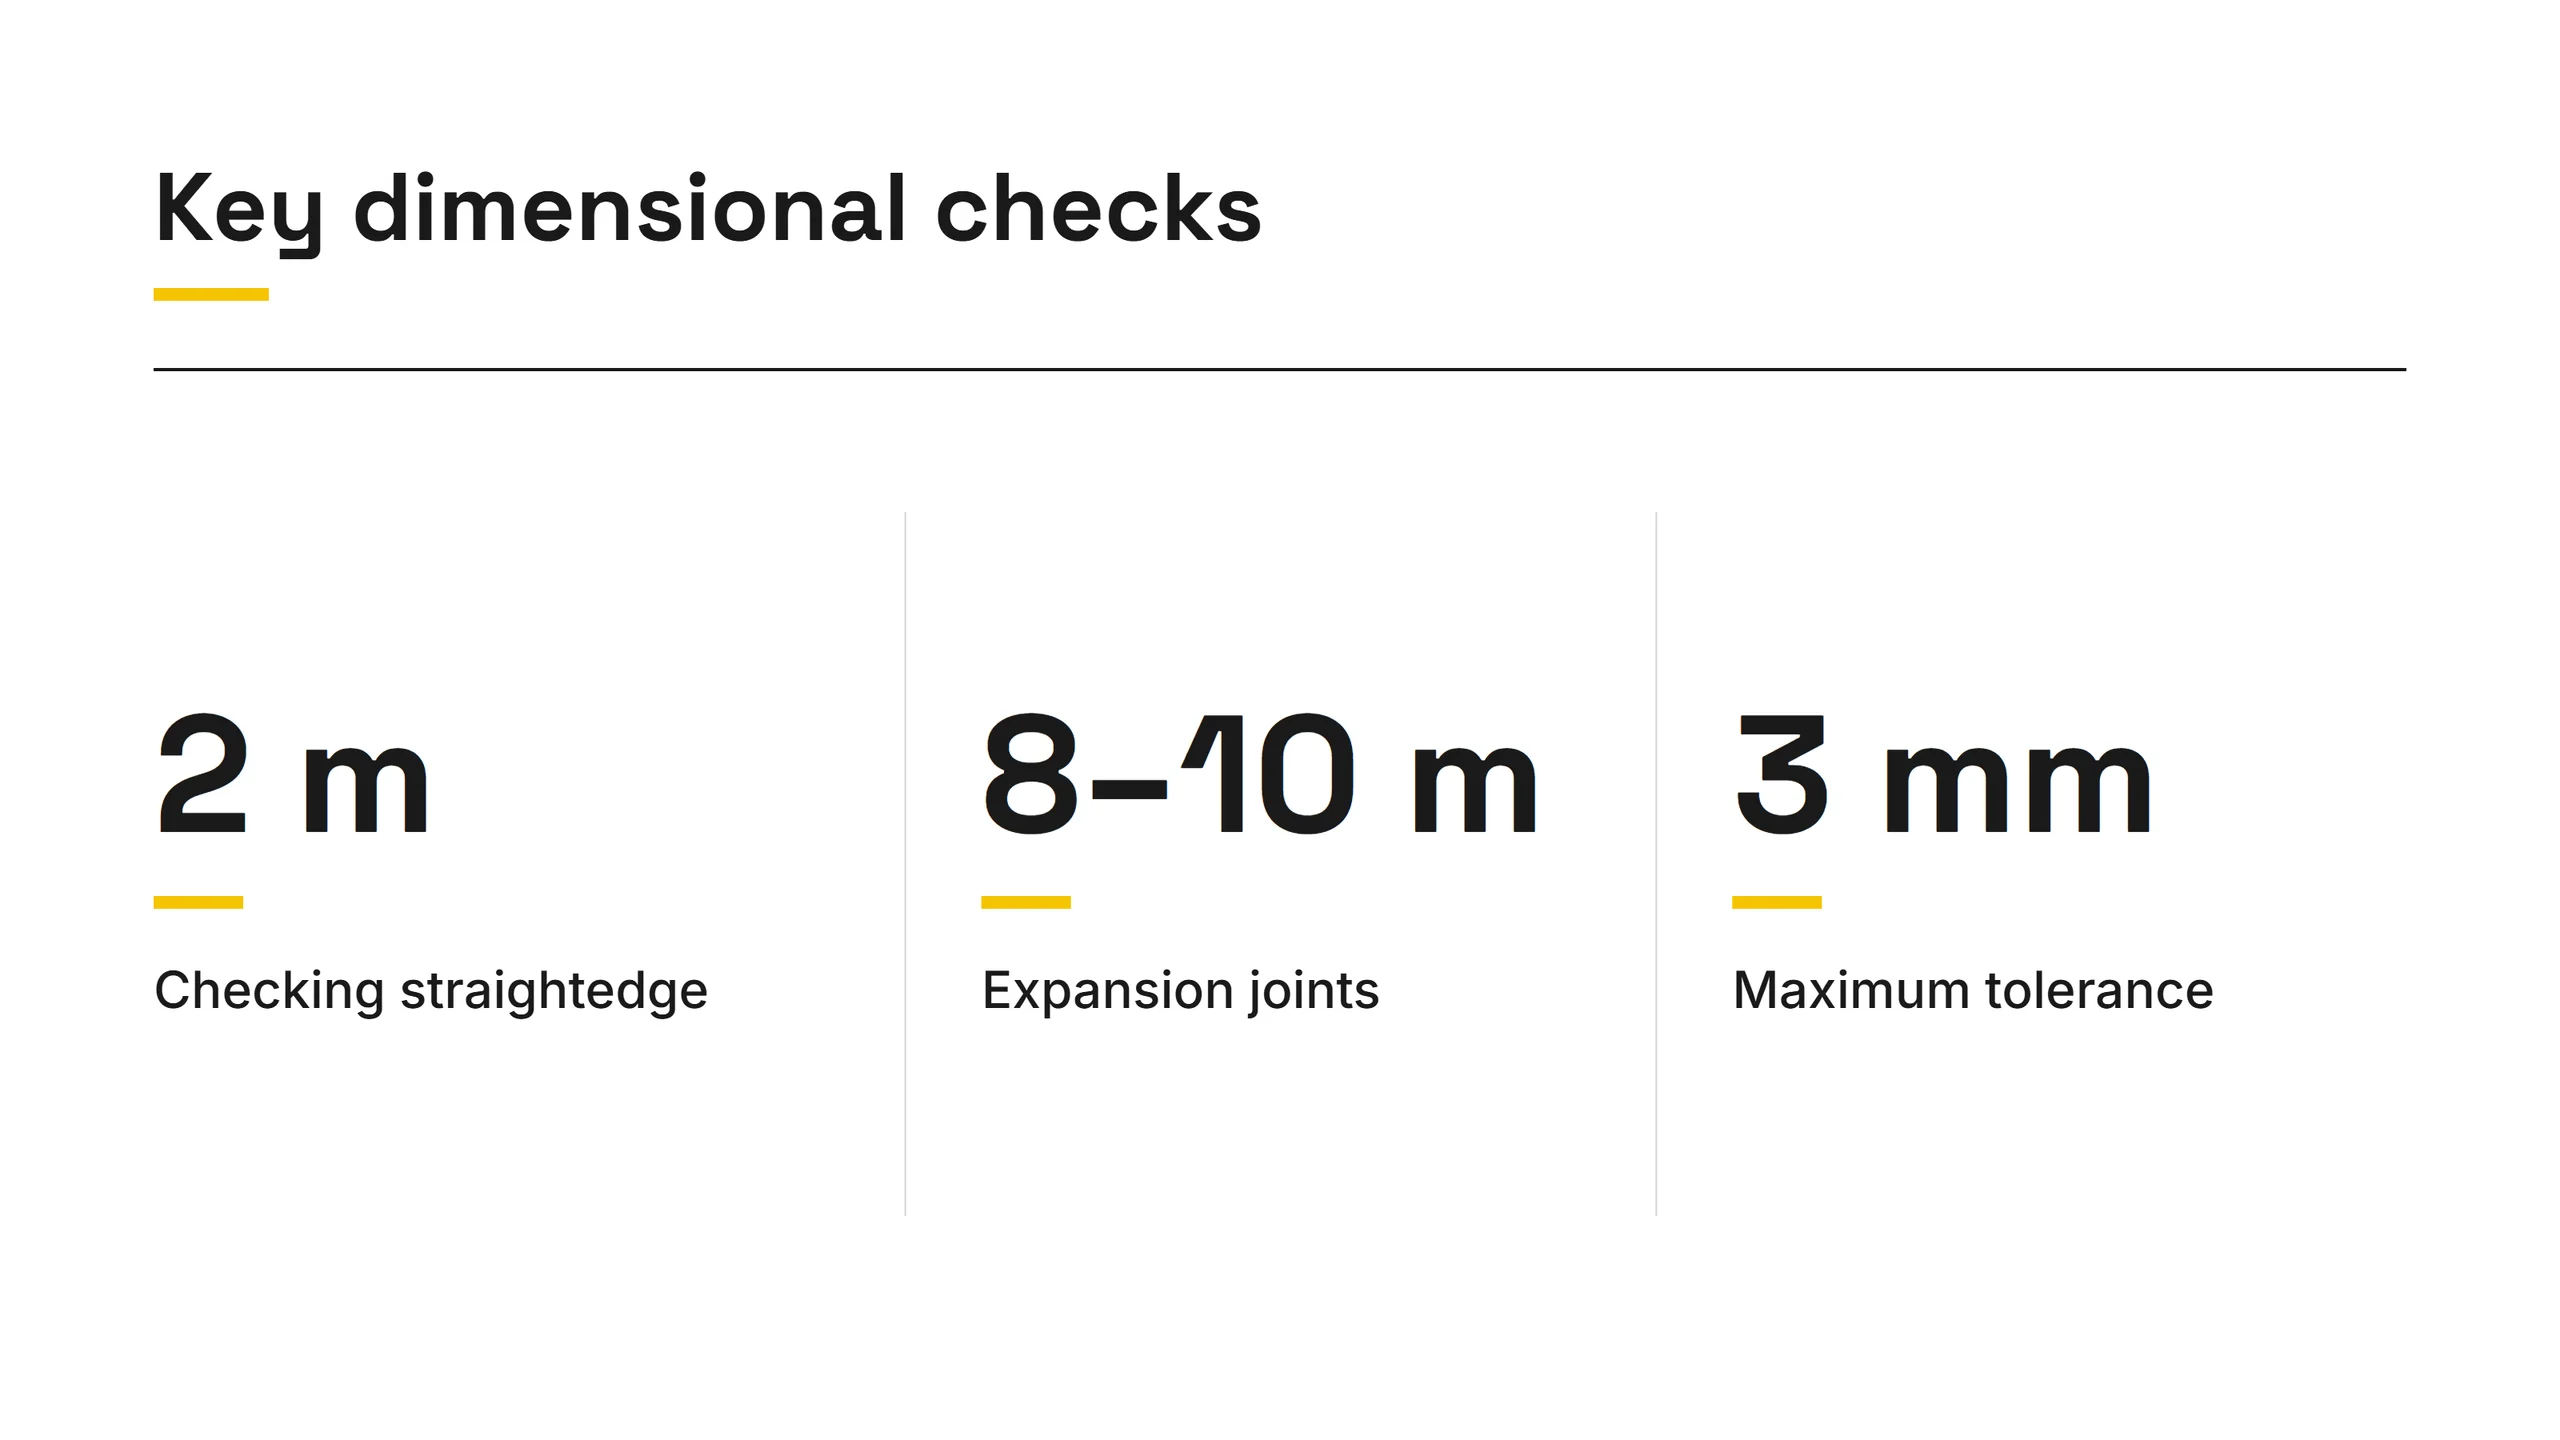
- Check the flatness of the substrate with a straightedge of at least 2 meters; large deviations require a self-leveling screed before installation.
- Use C2 adhesive, with improved adhesion, for any porcelain tile. A C1 adhesive can cause debonding over time, especially with large formats.
- Back-butter the tiles (“double buttering”), meaning adhesive on the screed and on the back of the tile, for full coverage without air pockets.
- Leave expansion joints every 8 to 10 linear meters and along the walls, especially if the space has underfloor heating.
- Use leveling systems (clips and wedges) to align the edges of large tiles and avoid visible lippage at the joints.
The most common mistake on site is laying rectified tiles directly on an unchecked screed, just because “that is how it is usually done”. The result is a visual disaster under side light, exactly where the fine joint can no longer hide anything.
Professional advice: Ask the installer to check flatness with a straightedge before you confirm the tile format. If the substrate has more than 3 millimeters of unevenness over 2 meters, budget for a self-leveling screed before discussing aesthetics.
Practical scenarios: when to choose rectified and when non-rectified
The context of the space decides, more than pure aesthetic preference. A few typical situations help clarify:
- Large formats, modern and minimalist spaces (living rooms, commercial spaces with a contemporary identity): rectified tiles give the visual continuity you want.
- Terraces, outdoor areas or rustic-style projects: non-rectified tiles better tolerate temperature changes and the unevenness typical of outdoor substrates.
- Bathrooms with underfloor heating: rectified tiles work, but set the minimum joint to 1.5 to 2 millimeters to allow for thermal expansion.
- High-traffic commercial spaces (retail, HoReCa, clinics): check the PEI class and the slip-resistance class separately, because rectification affects neither of them.
For open-plan residential projects, rectified tiles remain the natural choice when you want the floor to read as a single continuous surface, without visual breaks. You can find more decision points in the article about parquet or tiles on underfloor heating, which is especially useful for areas with built-in heating systems.
Buying checklist and questions for the installer
Rectification does not replace essential technical indicators. Check them separately, however convincing the tile looks in the showroom:
- Ask for the PEI class, water absorption and slip-resistance class, because rectification does not affect the durability of the material, only its geometric precision.
- Ask for the production batch and the tolerances declared by the manufacturer, plus the joint recommendation for that specific product.
- Ask for a separate estimate for screed preparation and for rectified tile installation, so it is not hidden in the overall price.
- Ask the installer directly: which adhesive they propose, whether they use leveling systems and how much of the surface needs screed work before installation.
Costs, durability and maintenance: what budget to plan
The material difference between the two options is, on average, a higher material price for rectified tiles (constructii365.ro), and labor costs rise further because of the time needed to check flatness and install with precision.
In the long run, very thin joints are easier to maintain, because they collect less dirt and need less frequent grout cleaning. The advantage disappears completely, however, if the initial installation is wrong: any substrate error becomes expensive to fix once the tile is bonded.
At handover, check three concrete things:
- Overall flatness of the finished surface, tested with a straightedge under side light.
- Joint consistency, which must be uniform over the entire surface, without visible variations.
- Adhesive coverage, which can be checked by lifting a sample tile, if the work allows it.
A common problem on tight-budget sites is using a C1 adhesive on porcelain tiles instead of the recommended C2, to save on materials. The typical consequence is partial debonding a few months or years after installation, exactly what the C2 class is designed to prevent.
SelfDezign perspective: how we integrate the material into the design concept
At SelfDezign, the choice between rectified and non-rectified tiles is not a catalog decision, but one driven by the identity of the space and the real objectives of the project. A restaurant with a minimalist concept usually calls for the continuity of rectified tiles; a medical clinic may call for the same continuity, but for completely different reasons, related to the perception of hygiene and a clear visual route.
Sometimes we trade some aesthetic refinement for technical tolerance, especially when the existing substrate cannot reach the flatness a large rectified format needs without additional costs out of proportion to the project budget. The right choice is the one that serves the purpose of the space, not the fashion of the moment.
— Toni
How SelfDezign can help you with your material decision
Paid consulting is worth considering especially for projects with large formats, minimalist finishes or commercial spaces, where an installation mistake costs much more than an initial technical assessment. SelfDezign offers interior design services which include the technical specifications needed to decide between rectified and non-rectified tiles, adapted to the existing substrate and the concept of the space.
For owners who want a documented decision before signing with an installer, consultancy with written conclusions provides an installation data sheet, a list of recommended materials and the criteria for checking the work at handover. The service costs 500 RON per session and is useful exactly when you need to know what to ask the installer, not just which tile to buy.
Sources
The technical statements in this article are based on specialist sources on fit-outs and flooring, cited directly in the text. We recommend checking the data sheet of the chosen tile manufacturer before the final acceptance of the work.
- What is rectified tile and why it matters
- What rectified tiles mean and when they are worth choosing
- How to install floor and wall tiles: tips and ideas
Frequently asked questions
What are rectified tiles?
Rectified tiles are mechanically cut at the edges after firing, with 90-degree edges and dimensional tolerances below 0.3 millimeters, which allows joints of 1 to 2 millimeters.
What are non-rectified tiles?
Non-rectified tiles keep the natural edge from firing, with larger dimensional variations, and need joints of 3 to 5 millimeters to compensate for size (calibre) variation.
How much more do rectified tiles cost?
Rectified material costs on average 10 to 20% more than non-rectified material, and labor costs rise further because of the substrate flatness requirements.
Which adhesive is used for rectified porcelain tiles?
The recommended standard is C2 adhesive, with improved adhesion; a C1 adhesive can cause debonding, especially with large formats and heavy traffic.
How do I choose between rectified and non-rectified tiles for a bathroom with underfloor heating?
Both work, but with rectified tiles set the minimum joint to 1.5 to 2 millimeters to compensate for the thermal expansion of the substrate.
Is it worth asking for advice when choosing ceramic tiles?
For projects with large formats or commercial spaces, an initial technical assessment, such as the one SelfDezign offers, prevents high costs of correcting the installation later.