Step-by-step layout for medical clinics: complete guide
In order to set up a medical clinic according to the norms and operationally functional, the process follows a clear sequence: definition of technical → project functions according to NP 021-2022 DSP, ISU and College of Physicians → authorizations coordinated final → reception and opening → execution. There is no valid shortcut between these steps, and the order matters: a wrong decision made in the concept phase can generate costly restorations in the execution phase or block the sanitary authorization.
The six essential actions, in the order in which they must be addressed:
- Definition of functions— the complete list of the necessary cabinets, flows and facilities, before any layout sketch
- Preliminary documentation DSP/ISU— consultation of local requirements and verification of compliance of the chosen space
- the technical project;— architecture, installations, technical report, execution plans in accordance with the regulations in force
- Execution and endowment— coordination of works, acceptance of materials and installation of equipment
- DSP and ISU acceptance— submission of the complete file, field inspections and obtaining authorizations
- Operational opening— registration with the Ministry of Health, contracting mandatory services (waste, external sterilization if necessary) and the first patient
Key <x id="1"/>Takeaways
Setting up a medical clinic according to the norms requires the integration of the authorization requirements from the concept phase, not after execution.
|
Punct |
Detalii |
|---|---|
|
Reference Standard |
NP 021-2022 and MS Order 1.030/2009 (with updates 2025/2026) are the mandatory documents for any outpatient clinical technical project. |
|
Realistic timeline |
From brief to DSP authorization: 3–6 months in common scenarios; already compliant spaces can compress the process to 6–8 weeks. |
|
Streams & Zoning |
Clear separation of patient/personnel/contaminated material routes is a licensing condition, not a design preference. |
|
Budget and Negotiation |
Negotiate 1–2 months of grace for fit-out in the lease; purchase critical equipment after validation of the technical project. |
|
SelfDezign |
It covers the entire clinical development process: concept, technical project, execution coordination and support for DSP/ISU authorizations. |
What the project looks like step by step: from brief to first patient
A clinical fit-out project has six distinct phases, each with its own deliverables and clear dependencies to the previous phase. Treated separately, these phases become manageable. Compressed or mixed, it generates chaos and additional costs.
Project phases and indicative durations
|
Live |
Indicative duration |
Main deliverables: |
Main responsible |
|---|---|---|---|
|
Brief and feasibility study |
1-2 weeks |
List of functions, space analysis, estimated budget |
Beneficiary + designer |
|
Visual concept and functional layout |
2-3 weeks |
Zoning plans, mood board, finishes proposal |
Interior Designer |
|
Complete technical design |
3–6 weeks |
Architectural plans, installations, technical report |
Authorized Designer |
|
Preliminary approvals (ISU, urbanism) |
2–6 weeks |
ISU Approval, Urbanism Certificate, Technical Approvals |
Beneficiary + designer |
|
Execution and endowment |
4–12 weeks |
Completed works, installed equipment |
Site Coordinator |
|
DSP file, inspections, acceptance |
4–12 weeks |
Sanitary authorization, acceptance report |
Beneficiary + designer |
The above durations reflect typical scenarios. A compliant space can speed up the execution, and one that requires structural changes or new installations can extend the process significantly, according topractical estimates from specialized guidese
Phase checklist: what to check before moving forward
- Full brief signed by the beneficiary, with the list of functions and specialties
- Space analysis: surfaces, heights, existing installations, structure
- Concept approved by the beneficiary before the start of the technical project
- Technical design verified by MLPDA authorized verifier
- Preliminary approvals obtained before the start of the execution
- Partial acceptance protocol for installations, before finishes
Roles and Deliverables: Who Does What
- Beneficiary (Owner Physician or Investor)— approves the brief, signs contracts with suppliers, submits the file to DSP and ISU, contracts the medical waste company
- The Interior Designer— elaborates the visual concept, the functional layout, the selection of finishes and coordinates the aesthetic coherence with the normative requirements
- Authorized Technical Designer— draws up the technical project (architecture, plumbing, electrical, HVAC), the technical report and the documentation for the authorizations
- Site Coordinator— supervises execution, verifies compliance with the project, manages suppliers and deadlines
- General Practitioner— Mandatory role for DSP authorization; responsible for medical procedures and clinic staff
What DSP, ISU, College of Physicians and ONRC require for authorization
The authorization of a medical clinic involves several institutions simultaneously, and the documents for each must be prepared in parallel, not sequentially. The most common bottleneck occurs when the Employer treats authorizations as a separate design stage, instead of integrating them from the concept phase.
DSP assesses the project from the perspective of medical operation: clean/dirty circuits, facilities, hygienic finishes, technical report consistent with the execution plans and the list of equipment. The minimum documents for the DSP dossier include:
- Standard application (county DSP form)
- Descriptive technical report of functions, flows and endowments
- Architectural plans endorsed by the authorized designer (general plan, sections, details)
- List of medical personnel and equipment
- Contracts for mandatory services (medical waste, external sterilization if applicable)
- Proof of the right to use the space (lease agreement or deed of ownership)
- ONRC registration certificate of the legal entity
ISUis mandatory for spaces with an area of more than 600 m² or with specific functions (e.g. : day hospitals, units with more than 50 people simultaneously). For smaller outpatient clinics, the ISU endorsement can be replaced with a fire safety scenario signed by an authorized specialist. ISU checks: escape routes, fire extinguishers and hydrants, emergency markings, fire detection system and related technical documentation.
College of Physicians Iașiissues individual opinions for each physician working in the clinic. The managing physician must be enrolled in the College and have the specialty corresponding to the profile of the clinic. The opinion of the College is a prerequisite for the authorisation of the public service delegation.
ONRCregisters the legal entity (Srl, SRL-D or individual cabinet). The estimated duration is3–5 business days, and the DSP authorization follows later, with an indicative term of 30–60 days depending on the complexity of the file and the county in which the clinic operates.
The structure of a technical report: what it must contain
An incomplete technical report is the most common reason for rejecting the DSP file. The minimum structure includes: description of functions and flows (patients, personnel, clean materials, contaminated materials), surfaces of each room, finishes and materials used, technical installations (ventilation, water, sewerage, electricity), list of medical equipment and sanitation and sterilization procedures adopted.
The reference norm for the design of outpatient medical units is NP 021-2022, approved by Order no. 2. 500/2022. It establishes the requirements of spatial-functional organization, installations and subdivision and must be checked for any local changes applicable to the project. Order of the Minister of Health no. 1. 030/2009, with the updates of 2025/2026, regulates the sanitary authorization procedures and the mandatory hygienic-sanitary conditions.
How to plan your space: reception, cabinets, sterilization and flows
Planning the space of a clinic does not start from aesthetics, but from function. Each layout decision must answer an operational question: how does the patient move, how does the staff move, where are clean materials separated from contaminated ones?
Some practical milestones, presented as general recommendations (exact requirements vary depending on the specialty and local DSP rules):
- Reception and waiting room: minimum recommended area is 8–12 m² for reception and at least 1.5 m² per waiting place; access must be directly from outside, without crossing clinical areas
- Consultation Cabinet: recommended area of at least 12 m² for most specialties, with separate access for the patient and the possibility of natural or mechanical ventilation; Annex 2 of the PSD details the mandatory equipment by types of cabinets
- Patient bathroom: mandatory adapted for people with disabilities (door width minimum 90 cm, wheelchair manoeuvring space, support bars)
- Sterilization or pre-disinfection space: physically separated from the consultation rooms, with dirty area (instrument reception) and clean area (sterile storage)
- Storage of consumables: dedicated space, separated from the waste area, with controlled access
Clean/dirty zoning: the backbone of any medical layout
Flow separation is not a design preference, but a normative and operational requirement. A layout that mixes the path of patients with that of contaminated materials can block DSP authorization and generate significant recovery costs. The recommended routes are three: patients (from the entrance to the office and back), staff (separate access, locker rooms, preparation areas) and materials (clean consumables enter one route, waste exits another).
Examples of layouts by clinic type
- General Clinic (2–4 offices): central reception with a view to the entrance, cabinets arranged on a single corridor, patient bathroom at the end of the corridor, small pre-disinfection space adjacent to the cabinets
- DENTAL PRACTICE: cabinet of minimum 14–16 m² for a dental armchair, dedicated sterilization space (autoclave), separate waiting area for children if the profile requires it
- Light imaging (ultrasound, digital radiology): screen camera with radiation protection (for radiology), direct access from the waiting room, interpretation space separated from the examination area
Accesibilitate: European and local norms require ramps for level differences, door widths of at least 90 cm for cabinets and adapted toilets. These requirements are not optional and are checked by the DSP upon inspection.
What materials and finishes support the hygiene, durability and image of the clinic
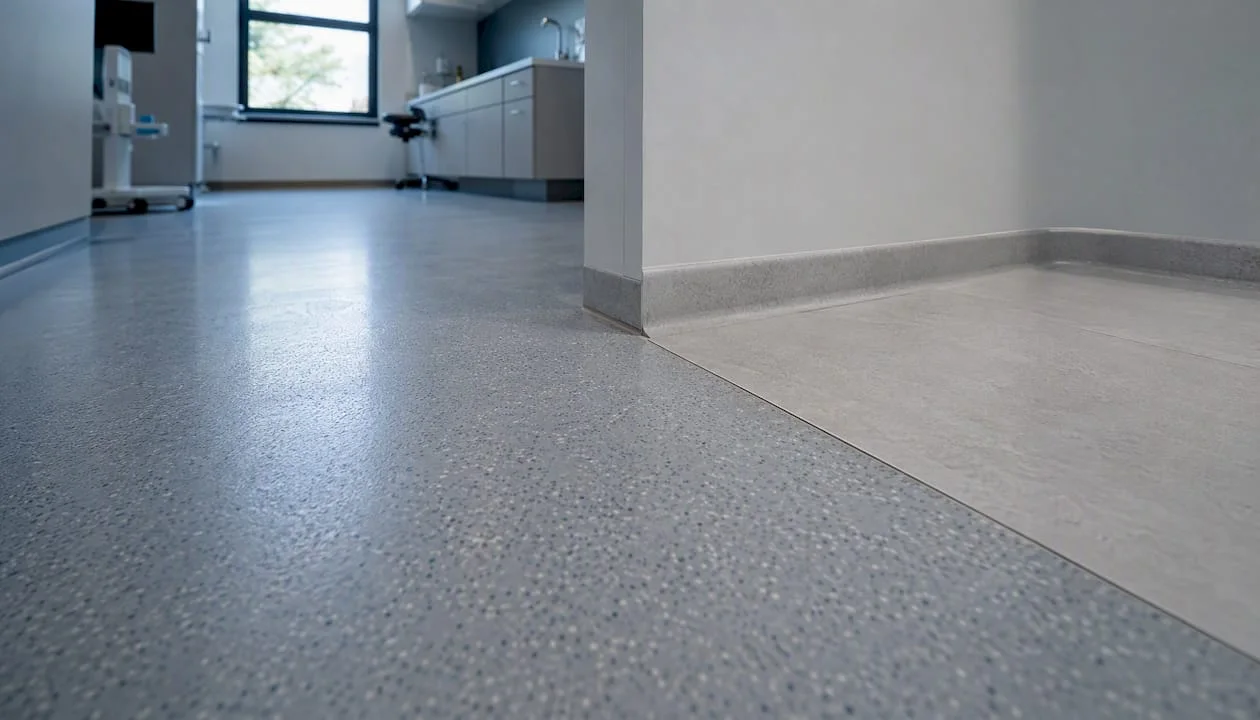
Choosing finishes for a clinic is a balancing exercise: materials must withstand aggressive disinfectants, be easy to clean, and at the same time communicate a level of care and professionalism that inspires patient confidence.
|
Surface |
Recommended material: |
Practical advantage |
|---|---|---|
|
Cabinet floor |
Homogeneous vinyl (e.g. Tarkett iQ, Forbo Marmoleum) |
Crevice-free, disinfectant-resistant, non-slip |
|
Wetland flooring |
Porcelain sandstone with a matte surface |
Waterproof, easy to sanitize |
|
Cabinet walls |
Epoxy washable paint or antibacterial paint |
Resistant to repeated washing, no porosity |
|
Wetland walls |
Large ceramic tile or tiles formed |
No exposed joints, easy sanitization |
|
Technical furniture |
Medical stainless steel or melamine CHIPBOARD with ABS edge |
Moisture resistant, easy to disinfect |
|
Tavane |
Removable coffered ceiling with washable plates |
Access to installations, neat appearance |
Selection criteria do not come down to appearance. A material that looks good but does not resist isopropyl alcohol or chlorine becomes an operational problem in 6–12 months. Always check the manufacturer's data sheets for compatibility with disinfectants used in the clinic.
Tip: At SelfDesign, the selection of clinic finishes starts from the list of cleaning and disinfection products that the clinic intends to use. Only after we know the concentrations and frequency of application, we choose the materials. This reverse order to the usual practice eliminates the unpleasant surprises after the inauguration.
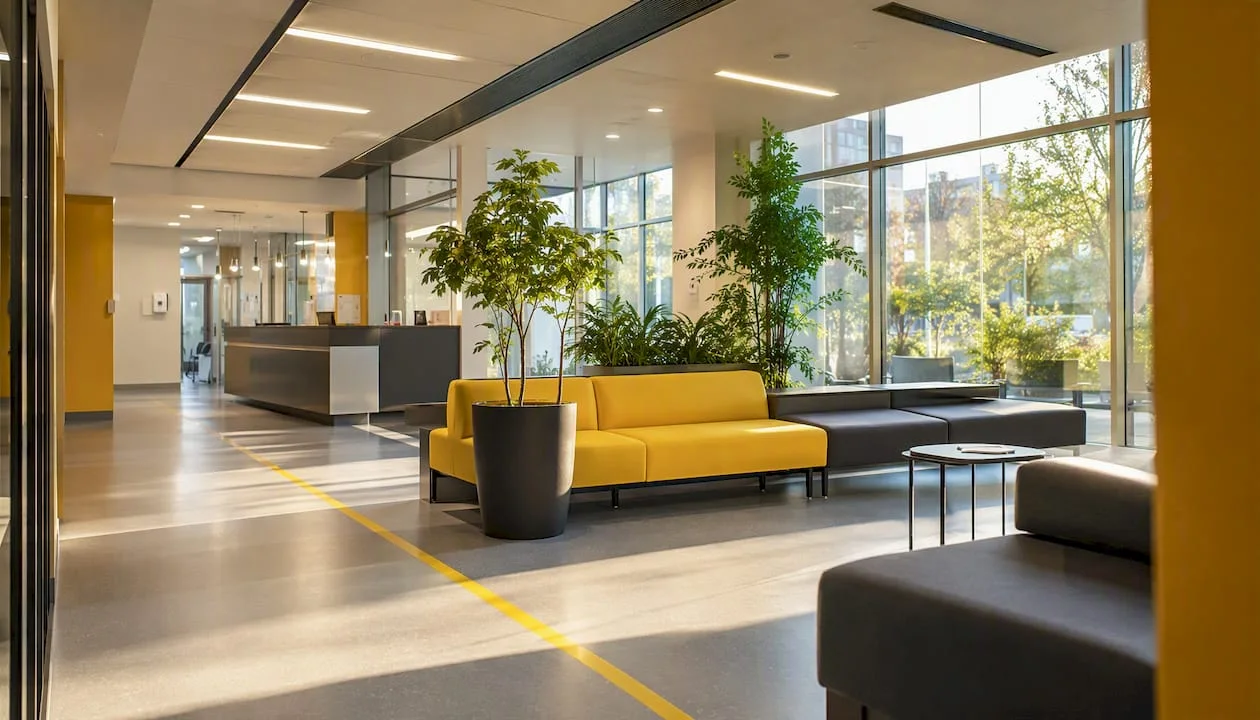
Colors and materials also contribute to the patient experience. Neutral tones (warm white, light gray, beige) reduce anxiety in waiting areas, while a controlled color accent (a wall, a floor strip) can visually guide the patient without additional signage. Wood or materials with natural texture in reception add heat without compromising hygiene, if applied to surfaces that do not come into direct contact with medical procedures.
Which technical installations are mandatory and how to check them before acceptance
A clinic's technical installations are not just a matter of comfort. They are a condition of authorization. DSPs and ISUs check the technical documentation and, in some cases, require test reports before the permit is issued.
Ventilation and HVAC
The type of activity dictates the ventilation requirements. A general examination cabinet can operate with natural ventilation complemented by simple mechanical ventilation. A laboratory, radiology room or sterilization area requires mechanical ventilation with specific filtration and controlled differential pressures. The documents required for acceptance include the commissioning report of the HVAC system and, if required by local rules, an air quality measurement report.
Iluminat
Consultation offices require lighting of at least 500 lux on the work plan, according to European standards EN 12464-1. Waiting areas work well at 200–300 lux, with indirect or diffuse lighting that reduces visual fatigue. Emergency lighting is mandatory on escape routes and must operate autonomously for a minimum of 1 hour.
Power supply and medical sockets
Sockets in medical offices must be earthed and, for critical equipment, connected to a protected circuit. Imaging or continuous monitoring equipment requires UPS (uninterruptible power supply) to prevent data loss or procedure interruption. The electrical plane must anticipate the total load of the equipment, not just the basic installation.
Details of the technical detail in the design of clinics are essential to anticipate these requirements from the design phase, not after execution.
Pre-acceptance checkpoints
- Functional testing of HVAC system with written report
- Checking the continuity of the earthing sockets (electrical check bulletin)
- Emergency lighting test (range, coverage)
- Checking the pressure in the cold and hot water system
- Functionality of the fire detection system (if any)
- Complete technical documentation for each installation (technical books, certificates of conformity)
Steps for checking the installations:
- Request verification bulletins from contractors before partial acceptance
- Check that the documents are issued by authorized persons/companies (ANRE for electricity, ISCIR where applicable)
- Archive all documents in the acceptance file, organized by installation categories
- Schedule DSP/ISU inspection only after all documents are complete
How to organize sterilization flow and infection control
Sterilization is not an optional or “end-to-end” dimensioning function. It is a normative requirement and a DSP authorization condition, and the way it is spatially organized directly influences the layout of the entire clinic.
Standard process, in operational order:
- Acceptance of instruments used— dirty area, physically separated from the rest of the clinic; the instruments do not circulate through the clean areas
- Cleaning and sorting— washing by hand or in the washing machine, sorting by categories (reusable, disposable)
- Chemical or thermal disinfection— according to the protocol adopted by the clinic and approved by the managing physician
- Sterilizare— autoclave with validated cycle or reference to an authorized external unit (mandatory contract, with register)
- Sterile Stow— in a dedicated space, with controlled access, away from the dirty area; sterile packaging shall be checked at each use
If the clinic does not have space for its own sterilization room, the contract with an authorized external unit is the valid solution, but it must be documented and presented to the DSP. The sterilization register (or record of external referrals) is mandatory and checked upon inspection.
Minimum documents for infection control
- Standardized sanitization and disinfection procedures (by areas and surfaces)
- Sterilization register or external contract record
- Regular staff training plan (signed and dated)
- Safety Data Sheets for Disinfection Products Used
- Accident management protocol with exposure to blood or biological fluids
How to manage medical waste: separation, contracts and best practices
Healthcare waste is strictly regulated and cannot be disposed of through the municipal collection system. The contract with an authorized company for collection and disposal is mandatory and must be submitted to the DSP prior to authorization.
|
Waste category |
Recommended container |
Mandatory labelling |
|---|---|---|
|
Biologically contaminated waste (dressings, gloves) |
Yellow bag in rigid box |
“Hazardous Health Waste” |
|
Sharp objects (needles, scalpels) |
Yellow rigid container (sharps box) |
“Cutting-Piercing Objects” |
|
Pharmaceutical wastes (expired drugs) |
Separate container, labelled |
Pharmaceutical (DOOP) |
|
Non-hazardous waste (paper, clean packaging) |
Black/grey bag |
Standard municipal collection |
Recommended clauses in the contract with the collection company
- Minimum collection frequency (adapted to the clinic volume)
- Company Responsibility for Supply of Compliant Containers
- Transport and disposal documents (hazardous waste transport forms)
- Notification clause in case of impossibility of timely collection
- Archiving of disposal documents for a minimum of 3 years (DSP requirement)
Personnel handling medical waste should be trained periodically, equipped with sturdy gloves, mask and, where appropriate, safety glasses. The waste disposal route must be separated from the patients' route and that of clean materials.
What equipment is needed and how to purchase it correctly
The equipment list is not a detail to be solved after arrangement. The planning of the equipment decisively influences the technical project: cables, special sockets, ventilation and service access must be anticipated from the concept phase, not added later.
Minimum equipment per type of clinic
- General Clinic: examination table, blood pressure monitor, stethoscope, electrocardiograph, negatoscope, medical scale, vaccine refrigerator (if applicable), emergency kit with defibrillator
- DENTAL PRACTICE: dental armchair with unit, autoclave, dental X-ray machine (RVG or panoramic), rotary instrumentation, surgical vacuum cleaner, light curing lamp
- Light imaging (ultrasound): ultrasound with appropriate probes for the specialty, thermal printer, image archiving station (PACS or cloud solution)
- Minimum laboratory: centrifuge, microscopes, basic hematological analyzer, sample refrigerator, personal protective equipment
|
Echipament |
Acceptance check |
Required Documentation |
|---|---|---|
|
Autoclave |
Bowie-Dick test, biological test |
Technical book, CE certificate of conformity |
|
Ecograf |
Functional test with samples |
CE certificate, operating manual |
|
Radiology Apparatus |
Dosimetry test |
CNCAN authorization, dosimetry report |
|
Defibrilator |
FUNCTIONAL TEST |
CE certificate, operating instructions |
Purchase Recommendations
Purchase critical equipment (autoclave, imaging equipment) only after validation of the space and after the technical design confirms that the installations support the technical requirements of the equipment. Premature purchase of the equipment before the completion of the technical design is a frequent source of incompatibilities and additional costs. Phase purchases: first equipment requiring special installations, then standard endowments.
How much it costs and how long it takes: indicative budget and timeline estimates
Costs and durations vary significantly depending on the area, specialty, location and initial condition of the space. The figures below are indicative ranges, not firm bids.
|
Step |
Indicative duration |
Remark s |
|---|---|---|
|
Brief, concept, technical project |
6–11 weeks |
Depends on complexity and speed of approval |
|
Preliminary approvals (ISU, urbanism) |
2–6 weeks |
Varies by county |
|
Execution and endowment |
4–12 weeks |
Compliant spaces: lower end of the range |
|
DSP file and inspections |
4–12 weeks |
30–60 days in typical scenarios |
|
ESTIMATED TOTAL COST |
3-6 Months |
Quick Scenario: 6–8 weeks for spaces already compliant |
Indicative cost ranges, by components:
- Design (concept + technical): 5-15% of the total fit-out budget, depending on complexity and area
- Execution (construction and finishing works): €300–800/m² depending on the level of finish and the initial condition of the space (big city vs. medium city)
- Medical Equipment: varies extremely much by specialty; a basic general practice can be equipped with €10,000-30,000, a complete dental practice with €30,000-80,000
- Taxes & Permits: several hundred euros for administrative fees, plus fees of ISU verifiers and specialists
- Rent Guarantee & First Months: 2–3 early rents, negotiated with the landlord
Tip: Always negotiate a grace period of 1–2 months for fitting out in the lease. Commercial space owners are used to this practice, and for you it means that you do not pay rent during the period when the space does not generate income. It is one of the most effective measures to protect cash-flow at the beginning of the project.
How to choose the designer, the execution company and the suppliers
Choosing the project team is probably the decision with the greatest impact on the final quality and on meeting deadlines. An inexperienced designer in medical facilities can deliver an aesthetic project, but not compliant with the requirements of the DSP, which means redesigns and delays.
Essential Questions for Design & Execution Suppliers
- How many medical clinic projects have you completed in the last 3 years? Can you provide verifiable references?
- Is the technical designer MLPDA authorized and experienced in medical projects?
- How do you manage the relationship with DSP and ISU in the authorization phase? Are you assisting the customer or just delivering the documents?
- What is the warranty for the executed works and how to manage the defects occurred during the warranty period?
- Do you have professional indemnity insurance? Can you present the policy?
- What is the response time for post-reception emergency interventions?
Red flags: when to decline a supplier
- Cannot provide references for completed medical projects
- Does not have an authorized technical designer in the team or outsources this function without transparency
- The price offered is significantly below the market average without a clear explanation
- Execution deadlines are vague or are not assumed contractually
- Avoids discussing compliance with DSP/ISU rules or does not know the basic requirements
Recommended protection clauses in the contract
- Assumed execution term, with penalties for unjustified overrun
- Guarantee of execution of at least 24 months for hidden works
- Explicit responsibility for compliance with applicable PSD/ISU rules
- Retention clause (10-15% of the contract value, released after final acceptance)
- Procedure for managing changes to the project (written change order, approved by the beneficiary)
How you coordinate execution and what you check at the final acceptance
Final acceptance is not a formality. It is the moment when each decision made in the project phase is verified in the field, and the documents are organized for the DSP and ISU file.
Pre-reception checklist: what you check before calling the authorities
- All finishes are complete and project compliant (no uncoated surfaces, leaking joints)
- The clean/dirty circuits are physically separated and marked according to the plans
- Plumbing is running (water pressure, leaks, hot water temperature)
- The electrical installation has a verification report issued by ANRE authorized electrician
- The HVAC system works and has a commissioning report
- Emergency lighting is functional and tested
- Medical equipment is installed, tested and has full documentation
- Containers for medical waste are positioned as planned
Receipt file: what to contain
The DSP inspection is scheduled after submitting the complete file. The inspectors shall verify in the field that the space corresponds to the submitted plans and that the declared facilities are present and functional. Any inconsistency between the file and the reality on the ground may generate requests for completion or, in serious cases, rejection of the file.
SelfDezign Case Study: What a Real Clinic Project Looks Like
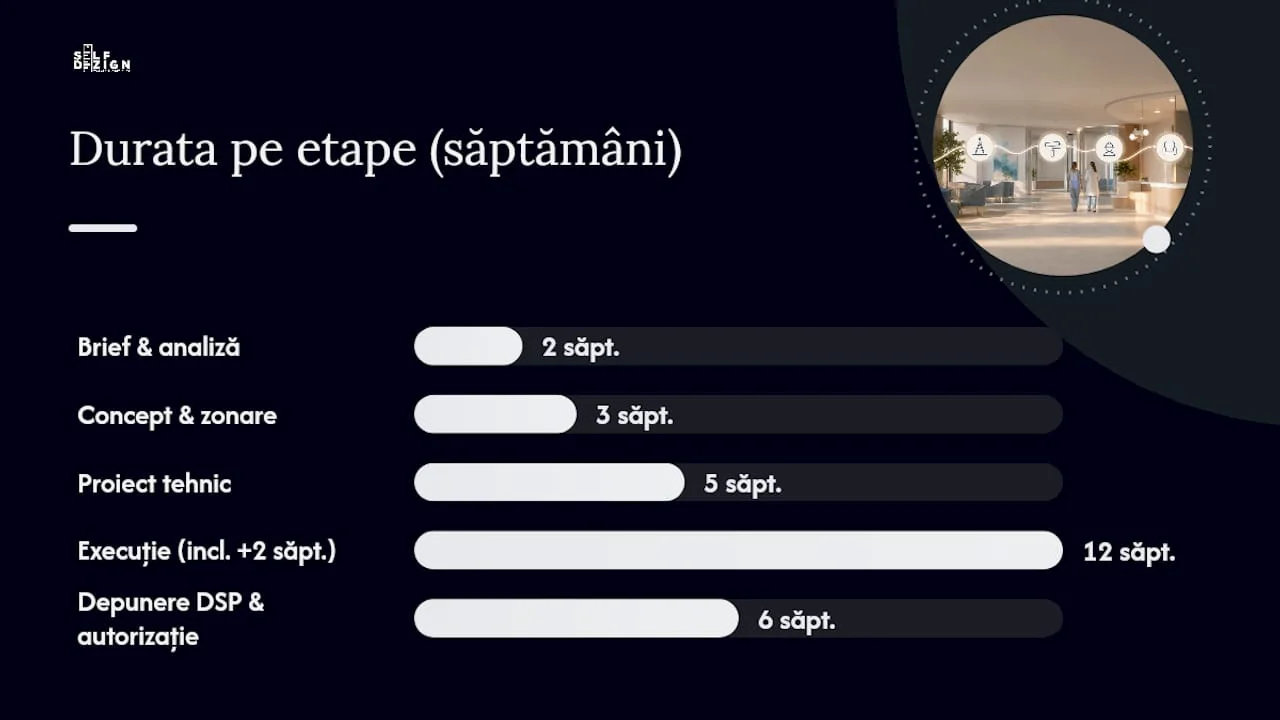
A recent project coordinated by SelfDezign involved setting up an outpatient medical center with four specialized offices, reception, waiting room and sterilization space, in a space of approximately 280 m² taken over in the raw state.
Project timeline:
- Weeks 1–2: detailed brief with the owner doctor, space analysis, identification of structural constraints (beams, columns, existing installations)
- Weeks 3–5: approved visual concept, functional layout with three zoning variants, preliminary selection of finishes
- Weeks 6–10: complete technical project (architecture, installations, technical report), project verification, submission of preliminary opinions
- Weeks 11–22: Execution, with a delay of 2 weeks caused by the delayed delivery of the vinyl floor; managed by rescheduling the installation works during that period
- Weeks 23–28: submission of DSP file, inspection, requested additions (a clarification on the waste circuit), authorization issued
Key design decisions and their reasons:
- The reception has been positioned with direct visibility to the entrance and the corridor of the offices, eliminating the need for an additional call system and reducing patient anxiety at first contact
- The homogeneous vinyl flooring in different colors by areas (pending light grey, white in cabinets) created a visual separation of flows without additional signage
- The sterilization chamber was located at the end of the corridor, with external access for waste disposal, without crossing the waiting area
A well-thought-out medical space isn't the one that looks best in photos. It is the one where the patient instinctively knows where to go, the staff does not waste time on logistics, and the authorities do not find reasons to reject the inspection. This was the criterion by which we evaluated each decision in this project.
Results for the customer: DSP authorization obtained in 26 weeks from the signing of the design contract, without major rejections of the file, the first patient 4 weeks after the issuance of the authorization.
What we do differently at SelfDesign when designing medical clinics
The difference is not in aesthetics, although it matters. It's in the order we ask the questions. Before proposing a finish or layout, we understand what specialty will operate in the space, what equipment will be used, how the patient travels and what DSP will check upon inspection.
We integrate the requirements of the technical report from the concept phase, not at the end. The selection of finishes is validated against the clinic's list of disinfectants. Coordination with the PSD is not left exclusively to the beneficiary, but is anticipated in the project. The result is a space thatinspires patient confidenceand reduces operational friction from day one.
How SelfDesign can help you set up your clinic
If you are at the beginning of the process and do not know where to start, or if you already have a space and want to understand what the technical project and authorizations involve,specialized consultancy for medical clinicsfrom SelfDezign covers the entire process: from visual concept and functional layout, to technical project, execution coordination and support for DSP/ISU reception.
Concrete services include:
- Initial consultancy and feasibility analysis of the space
- Visual concept and functional layout with zoning variants
- Complete technical project (architecture, installations, technical report)
- Coordination of execution and suppliers on site
- Support for the establishment of the DSP/ISU file and the preparation of the acceptance
For a quick estimate, prepare: the location plan of the space (or area and overall configuration), the list of desired functions and the estimated opening time. With this information, we can provide a clear first assessment of the complexity and next steps. Contact the SelfDezign team via the form on the website or directly request a consultation for your clinic project.
Surse
The following documents are essential for preparing the PSD file and verifying the regulatory requirements applicable to your project:
- How to Open a Medical Practice in Romania — Complete Guide 2026 | Delphi
- Annex 2 – Cabinet authorization requirements (DSPBV)
Important notice:ministerial rules and orders are updated periodically. Always check the version in force at the time of filing, directly on thelegislatie.just.roor to the competent county DSP. The information in this guide is general and does not substitute for specialized legal or technical advice.
This article is general information, not a substitute for advice from a qualified lawyer. Consult a qualified legal professional about your own circumstances before acting on anything here.